Chocolate Tart

It may be surprising but chocolate cream pie, or chocolate tart was a common dessert during Colonial times. Chocolate arrived in America via the West Indies and was used in drinking chocolate (cocoa) and the shells of the cocoa beans were used to make a light tea.

Eighteenth century chocolate was far different from what we know today—it was a grittier product and usually flavored with spices like nutmeg, cinnamon, and allspice in a recipe similar to traditional Central American and Mexican preparations. The smooth, creamy chocolate we know today wasn’t available until later in the 19th century when machinery was invented to grind the pure cocoa paste more finely and add back cocoa butter and sugar during the refining process. 

Chocolate Tart recipes are quite common in cookbooks of the period such as Englishwoman Hannah Glasse’s 1747 book The Art of Cookery Made Plain And Easy. Modern readers might be surprised that Glasse’s recipe (and most others of the time) calls for rice flour which is used as a thickening agent. Rice and rice flour were commonly used at the time since rice came to England and later America, via the robust British trade with the East and West Indies. Later, rice was grown in the southern American colonies as well. This recipe uses cornstarch as a more effective thickener however you can harken back to tradition and substitute rice flour instead. 

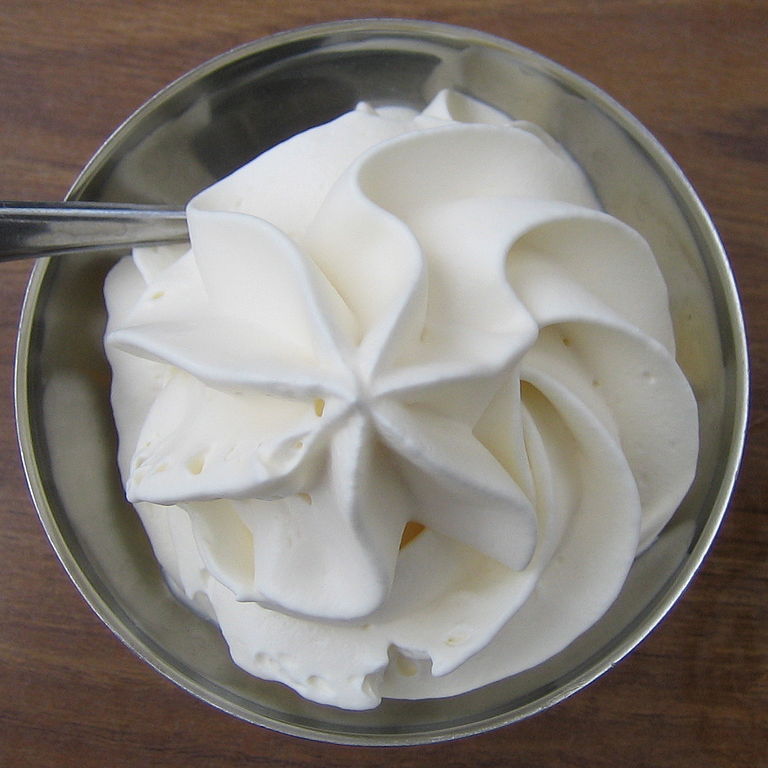
Traditionally this tart would have been served with a sugar crust on top like a crème brulee but we prefer to serve it with Chantilly cream (sweetened whip cream). You can find that recipe here


Ingredients

  • 1 tablespoon cornstarch or rice flour 
  • ¼ cup sugar (or to taste) 
  • 4 large egg yolks 
  • 2 cups heavy cream 
  • 1 tablespoon whole milk 
  • 6 ounces semisweet chocolate chunks or chips  
  • Pinch of salt 
  • 1 9-inch pie shell, frozen or use our recipe here 

Directions

Makes 1, 9-inch pie 

  1. In a medium bowl mix together  cornstarch or rice flour, sugar and egg yolks and set aside. 
  1. Mix together the cream and chocolate in a medium sauce pan over medium heat and bring just to a boil, stirring constantly until the chocolate is melted. Do not allow the mixture to boil. 
  1. Add the milk and pinch of salt. Stir well. 
  1. Using a ladle, pour 1/2 cup of  the chocolate mixture in a very thin stream into the egg mixture, whisking vigorously the whole time. You may also do this in the bowl of a stand mixer. 
  1. Add the egg and cream mixture back to the pot with the remaining chocolate cream mixture and whisk well. Heat over medium heat, whisking well until thickened, about 2 to 3 minutes. Remove from heat and allow to cool completely. 
  1. Preheat the oven to 350F. If using homemade pie crust, line a 9 inch pie plate with rolled out crust. Pour the cooled chocolate mixture into the pie crust and bake until firm—about 40 to 45 minutes. 
  1. Remove from oven and cool completely. Wrap in plastic and cool at least 8 hours but preferably overnight. Serve with Chantilly Cream.

Chantilly Cream

Sweetened whipped heavy cream by a fancy name is Chantilly Cream—a popular and delicious accompaniment to everything from fresh fruit to ice cream to pie and more. Culinary legend attributes this delightful airy concoction to the 17th century French chef, Vatel, who worked in the Château de Chantilly in France. In Chef Vatel’s time, as today, a copper bowl works best to whip cream—especially by hand. However, a good stand mixer and balloon whisk attachment make quick work of the job. 


Ingredients

  • 1 cup cold, heavy whipping cream 
  • 2 tablespoons sugar 
  • 1 teaspoon vanilla extract  

Directions

Serves 6 to 8

  1. Combine all the ingredients in a copper bowl or metal bowl of a stand mixer. 
  1. Whip until firm peaks form that hold their shape when the whisk or whisk attachment is lifted up and out of the bowl. 
  1. Serve immediately, chilling unused portions. 

Potato Croquettes

This simple dish was called “Potatoe Balls” in the 18th and early 19th centuries and an original recipe for this dish appears in Mary Randolph’s cookery book The Virginia Housewife published in 1824. These croquettes are a good way to use up leftover mashed potatoes. While the base recipe is simple, feel free to add spices or herbs to your liking. Nutmeg, imported from the West Indies, was a common ingredient in early American kitchens—even in savory preparations. Minced chives are a good addition as is grated cheese—1/2 cup of grated gruyere or 4 tablespoons soft goat cheese are two choices. 


Ingredients

  • 2 Pounds Russet potatoes 
  • 1 1/2 teaspoons salt 
  • 1 teaspoon freshly ground pepper 
  • 1/8 teaspoon nutmeg 
  • 1 egg yolk and 1 beaten egg 
  • 1 cup or more as needed Italian-style seasoned bread crumbs 
  • 1 cup safflower oil 

Directions

Makes about 18, serves 6 to 8 

  1. Cook the potatoes: Boil the potatoes, with their skin, in a large pot with enough water to cover. Cook until tender—about 20-25 minutes.  
  1. Drain potatoes and cool slightly until easy to handle and peel. Mash well and stir in the salt, pepper and nutmeg. Allow the mixture to cool completely. 
  1. Add the egg yolk to potato mixture and mix well to incorporate.  
  1. Lightly wet your (clean!) hands and roll the mixture into golf-ball sized balls.  
  1. Dip potato balls in the beaten egg, then roll them in bread crumbs to coat. Repeat with all the potato balls and then refrigerate for 15 minutes up to an hour. 
  1. Heat the oil in a large, deep bottomed frying pan over medium heat. Test the oil by dropping a bit of flour into the oil. If it immediately sizzles, then the oil is ready. 
  1. Place the potato balls gently into the hot oil, and fry until lightly browned, about 3 to 4 minutes. For a healthier option, place the potato balls on a baking sheet in a preheated 350-degree oven for about 10 to 15 minutes or until lightly browned.  

Shrewsbury Biscuits

Named for a town in England in the county of Shropshire bordering Wales, the Shrewsbury biscuit is essentially a shortbread cookie. Carried to America via early colonists this cookie was commonly flavored with caraway seeds which impart a faint licorice taste. If you don’t like caraway, you may simply omit it.


Ingredients

  • 1 tablespoon butter 
  • 8 ounces (2 sticks) softened butter 
  • 1 cup sugar 
  • 1 egg 
  • 2 ½ cups flour with additional as needed 
  • 1 ½ tablespoons caraway seeds 
  • zest of 1 lemon 

Directions

1. Preheat oven to 350 F and line cookie sheets with parchment paper. 

2. Cream together the butter until fluffy, about 3 to 4 minutes in a stand mixer. Add the egg and beat until well combined. 

3. Slightly crush the caraway seeds in a mortar and whisk into the flour along with the lemon zest. Add the flour to the butter and egg mixture and mix until it comes together in a ball. Wrap in plastic wrap and refrigerate for an hour. 

4. Flour a clean work surface liberally and roll out the dough to ¼ inch thick. Use a 2-inch round or fluted cookie cutter to cut out the cookies and place on the cookie sheet about 1 ½ inches apart. 

5. Bake for about 10 minutes or until they begin to brown slightly around the edges. Remove and cool before serving. 

Follow along with our video tutorial at home!

Beef Pasties

While it’s not definitively clear when meat turnovers were invented, meat pies have been referenced in a 13th century royal charter by England’s King Henry III and 14th century French cookbooks, which referred to the encompassing dough as paste. This is likely where the word “pasty” came from. 

In earliest versions, a stiffer version of the pastry dough itself served as a baking container for the meat filling. These later evolved into the popular “standing pies” which were eaten into the 19th century. The dough in these weren’t usually eaten because they were too tough. This standing pie dough was also called a “coffin”. 

As the pasty moved through the centuries, it became a go-to street food or fast food of days of yore. In English versions, potatoes, carrots and other ingredients joined meat in the pie so they ate like a full meal. The most well-known of these is the “Cornish Pasty” a popular, one-handed food for miners in Cornwall. As England expanded her colonial reach, outposts of the empire adopted the pasty and made it their own. The best example of this is the popular Jamaican Beef Patty. 


Ingredients

Puff pastry cut into 5 inch squares to total 8  (2 10”x 15” sheets), keep chilled or 1 14 oz package large inch empanada dough discs such as Goya or follow our recipe for pie dough below. 

  • 1 tablespoon butter 
  • 1 small onion, minced 
  • 1 small carrot, peeled, diced small 
  • ½ stalk celery, minced 
  • ½ pound ground beef 
  • 1 teaspoon tomato paste 
  • 1/8 teaspoon allspice 
  • 1/8 teaspoon nutmeg 
  • 2 teaspoons Madeira, port or sherry (optional) 
  • 2 teaspoons Worcestershire sauce 
  • 1 sprig thyme 
  • 1 medium Yukon Gold potatoes, peeled, diced small 
  • Salt and pepper to taste 
  • 2  eggs beaten well with 1 tablespoon water 

Directions

1.     Melt butter in large fry pan over medium heat and add onion, carrots and celery. Fry until onions are softened, about 6 to 7 minutes. 

2.     Stir in the ground beef, breaking apart the chunks with a wooden spoon and fry until browned, about 10 to 12 minutes.  Stir in the allspice and nutmeg and cook for 1 minute. Mix in the tomato paste and stir well, cooking for 1 more minute. 

3.     Add the Madeira, port or sherry, and cook for 1 minute while mixing. Add the Worcestershire sauce and ½ cup water. 

4.     Add the thyme sprig and potatoes and lower heat to medium-low. Cover and allow to cook for 10 minutes. Remove from heat and allow to cool completely. 

5.     Assemble the pasties, Method 1: Hold a puff pastry square like a diamond. Lightly roll with a rolling pin to thin slightly. Brush all edges with egg wash. Place roughly 1 to 1 1/2 tablespoons meat mixture on one side. Use as much filing as will fit comfortable a puff pastry square.  Fold the unfilled side up and over the meat mixture to make a triangle shaped turnover. Press down with a fork along the edges to make a seal. The egg wash will help. Repeat until all the pastry squares are filled. 

6.     Method 2: Using empanada disc, use a rolling pin to roll out the discs so they are about 25% larger all around. Fill as you would a puff pastry diamond—but these will be half-moon shaped. Place roughly 1 to 1 1/2 tablespoons meat mixture on one side of the disc. Fold the side without filling up and over  the meat mixture to make a half-moon shaped turnover. Press down with a fork along the edges to make a seal. The egg wash will help. Repeat until all the discs are filled. 

7.      Method 3: Line a greased cupcake tin with the empanada discs and gently press into place. Fill  each tin ¾-full with the meat mixture. Gently fold over the overhanding dough. Use a 3-inch round pastry cutter to cut circles out of another empanada dough disc. Brush one side with egg wash and gently press onto the top of the filled cupcake tin. 

8.     Method 4: Roll one recipe pie crust (below) into to a rectangle of 10 inches wide by 15 inches long. Cut into eight squares. Brush all the edges with egg wash. Hold the square like a diamond and place roughly 1 to 1 1/2 tablespoons meat mixture on one side.  Fold the side without filling up and over  the meat mixture to make a triangle shaped turnover. Press down with a fork along the edges to make a seal. The egg wash will help. Repeat until all the pastry squares are filled. 

9.     Prick each finished pasty with a fork and place on a parchment-lined baking sheet. Chill again for 15 minutes. 

10.  Preheat oven to 350 F. Brush each pasty with egg wash and bake the pastries for 15 to 30 minutes or until the crust is risen and golden brown. Serve hot. 


Flaky Pie Crust 

1 ½ cups all purpose flour 

1 teaspoon salt 

1 stick very cold butter or vegan butter, cut into small cubes 

Ice water as needed 

1.     Place flour and salt in a food processor and add the butter. Pulse lightly until you have a crumbly mixture. Alternatively, you may do this in a bowl using a pastry cutter or a sturdy fork to break up the butter in the flour and achieve a crumbly consistency. 

2.     Add ice water in small amounts (not more than 2 tablespoons at a time) until the dough just comes together without being dry. 

3.     Wrap the dough in plastic wrap and chill for at least ½ hour before using.